How to Use Arm Knitting to Create Cozy Scarves: A Beginner's Guide

Ready to get crafty without using traditional knitting needles? Arm knitting scarves is a trendy, quick, and fun way to make your own cozy accessories! Whether you're a seasoned knitter looking for a new technique or a complete beginner who’s never touched yarn before, arm knitting is accessible to all.
Also: Crochet Head Scarves: Inspirations for Every Style
This article will walk you through everything you need to know—from selecting the right yarn to the best techniques for creating stunning scarves.
In just a matter of hours, you can whip up beautiful, chunky scarves that not only keep you warm but also showcase your personal style. Let's dive into the world of arm knitting and unleash your inner DIY crafter!
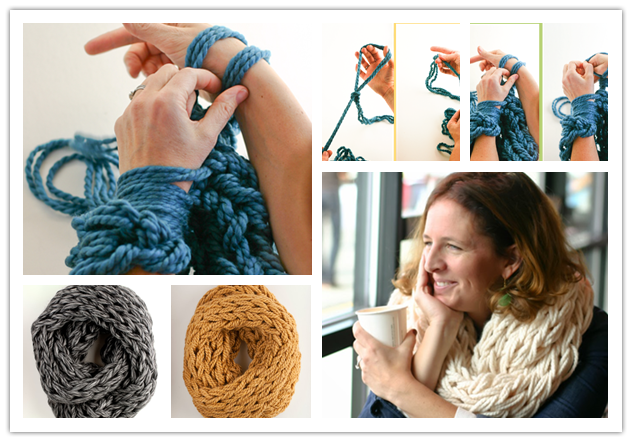
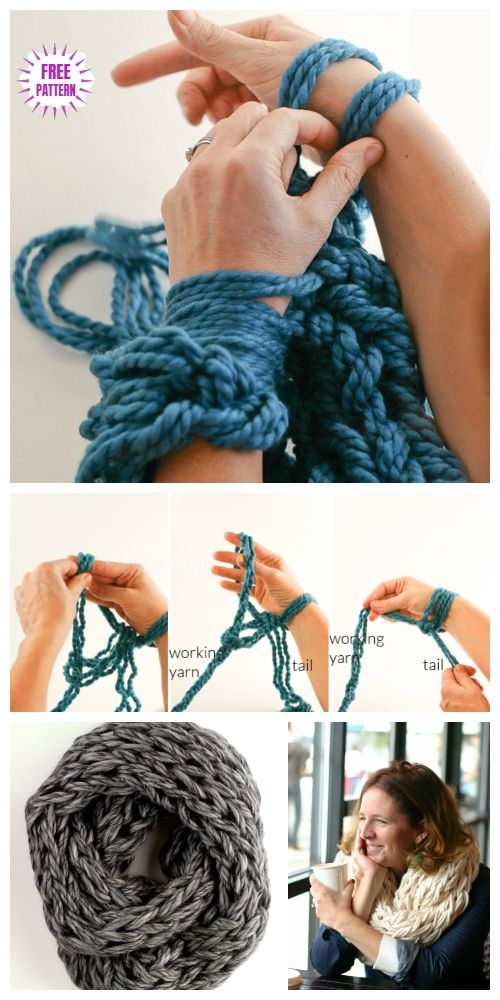
Diy Arm Knittings Scarves
Have you heard of arm knitting? Check this out how you can use your arms to knit beautiful scarves.
And here is another great arm knitting video tutorial for beginners. Have fun!

Follow this easy step by step tutorial from flax and twine in the following link to make your own scarf.
Arm Knitting Scarves

Why Arm Knitting is So Popular
Arm knitting has exploded in popularity for a few reasons:
- Quick Projects: You can finish a scarf in just 1–2 hours!
- No Needles Required: All you need are your arms and some yarn—perfect for beginners.
- On-Trend Style: Chunky, oversized scarves are always in style, and arm knitting helps you make your own custom piece.
- Perfect for Gifts: Hand-knitted scarves make thoughtful, personal gifts for loved ones.
Materials Needed for Arm Knitting a Scarf
Before you start arm knitting, gather the following materials:
- Super Bulky Yarn: Look for yarn labeled size 6 or higher. You’ll typically need about 3–4 skeins for a full scarf.
- Your Arms: Yes, your arms act as the knitting needles!
- Scissors: For trimming the yarn at the end.
- Measuring Tape (optional): To keep track of the length of your scarf.
Step-by-Step Guide to Arm Knitting a Scarf
1. Choose Your Yarn
Select a thick, chunky yarn. For a plush and warm scarf, opt for merino wool or an acrylic blend. The larger the yarn, the faster your scarf will knit up!
2. Cast On Stitches
Start by making a slipknot and placing it around your wrist. From here, you’ll cast on additional stitches (usually around 10-15) depending on how wide you want your scarf. Use your free hand to loop the yarn around your opposite arm, creating stitches directly onto your arm.
3. Start Arm Knitting
Once you’ve cast on your stitches, it’s time to knit! Move the stitches from one arm to the other by pulling loops of yarn through each stitch. This forms the body of the scarf. Tip: Keep your loops loose for a chunkier, more relaxed look.
4. Knit to Desired Length
Continue knitting until your scarf reaches the length you want (typically around 5–6 feet). Keep an eye on the length, so you don’t accidentally make it too long!
5. Bind Off
To finish, you’ll need to bind off your stitches. Transfer the first two stitches onto your arm, then pull the second stitch over the first and drop it off your arm. Repeat this process until you have one loop left. Cut the yarn and pull it through the final loop to secure.
6. Weave in the Ends
Use your hands to tuck the loose yarn ends into the stitches to give your scarf a neat and finished look. No tapestry needles needed—just use your fingers!
Why Arm Knitting is Perfect for Beginners
The beauty of arm knitting is its simplicity. You don’t need years of knitting experience or a huge supply of tools to get started.
Because you’re using your arms instead of needles, it’s much easier to see how the stitches are forming, which makes learning the basics of knitting more intuitive. Learn how to use arm knitting to create chunky scarves with this easy-to-follow guide. Get tips on materials, techniques, and style ideas for your DIY scarf project.
CHECK MORE CROCHET PATTERNS