Create a Stylish and Fun Panama Hat for Girls with Crochet
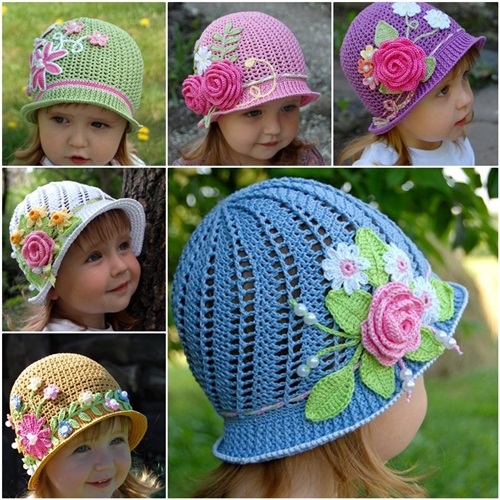
Crocheting a pretty Panama hat for girls is the perfect project to combine style, practicality, and creativity.
This hat is not only lightweight and breathable for sunny days, but it also adds a touch of elegance to any summer outfit.
In this article, we’ll guide you through the steps to make a beautiful Panama hat that any girl would love to wear, while giving your crochet skills a fun and rewarding challenge.
Panama Hat for Girls with Crochet
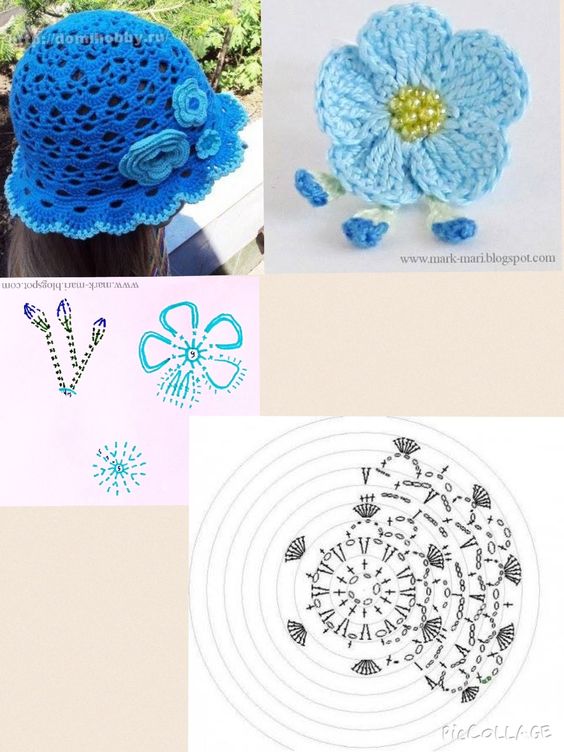
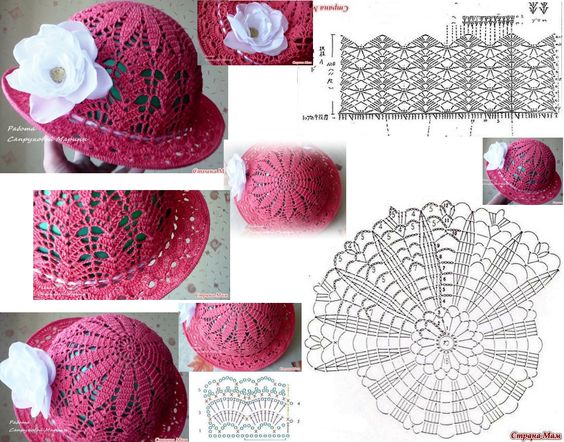
In spring and summer can be attributed to little fashionistas here are wonderful hats, panama. Bright and flower, they become a beautiful addition to any outfit a little girl.
These panama hats are so cute. Do you want to crochet one for your little fashionistas?

I wish you all endless inspiration and sunny mood!
Materials Needed
To make this crochet pretty Panama hat for girls, gather the following materials:
- Yarn: Use a lightweight, breathable yarn such as cotton or linen (typically DK or light worsted weight).
- Crochet hook: A size suitable for your yarn (usually 3.5 mm - 4.5 mm).
- Stitch markers: To keep track of your rounds.
- Yarn needle: For weaving in ends.
- Scissors: For cutting the yarn.
- Ribbon or decorative band (optional): To add a stylish finishing touch.
Step-by-Step Instructions for Crocheting a Pretty Panama Hat
1. Start with the Crown
- Magic Ring: Begin with a magic ring (or chain 4 and join with a slip stitch to form a ring).
- Round 1: Work 6 single crochets (sc) into the ring, pull tight, and slip stitch (sl st) to join.
- Round 2: Work 2 sc in each stitch around (12 sc).
- Round 3: 1 sc in the first stitch, 2 sc in the next stitch; repeat around (18 sc).
- Continue increasing: Keep increasing in the same pattern until the crown reaches the desired diameter. Typically, for a child-sized hat, you’ll need about 5-6 rounds of increases.
2. Shape the Body
- Work even: Crochet 1 sc in each stitch around without increasing. Continue this for several rounds until the hat reaches the height needed for the head (usually 4-5 inches for a child).
- Add texture: You can switch to a half-double crochet (hdc) or double crochet (dc) stitch for variety or keep it in single crochet for a classic look.
3. Create the Brim
- Start increasing: To create the Panama-style brim, begin increasing again. Work 1 sc in the first stitch, 2 sc in the next around.
- Continue increasing: Depending on how wide you want the brim, you can repeat this increase every few rounds (e.g., every third round) to maintain the flare of the brim.
- Finish with an edge: You can add a decorative edge by working a crab stitch (reverse single crochet) or picot stitch around the brim for extra flair.
4. Customize with a Ribbon
- Add a ribbon or band: Once the hat is complete, thread a ribbon or decorative band around the base of the crown for a polished, feminine touch.
- Secure it: You can sew the ribbon in place or simply tie it in a bow for a cute accent.
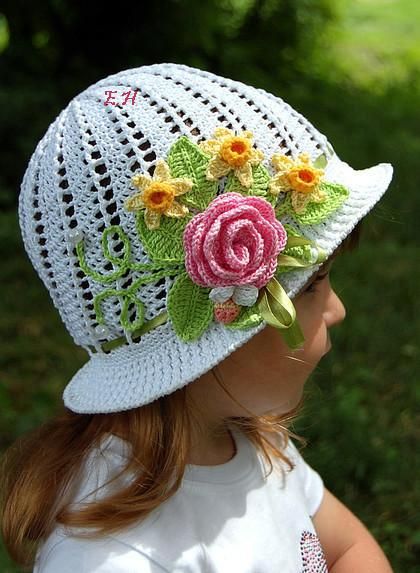
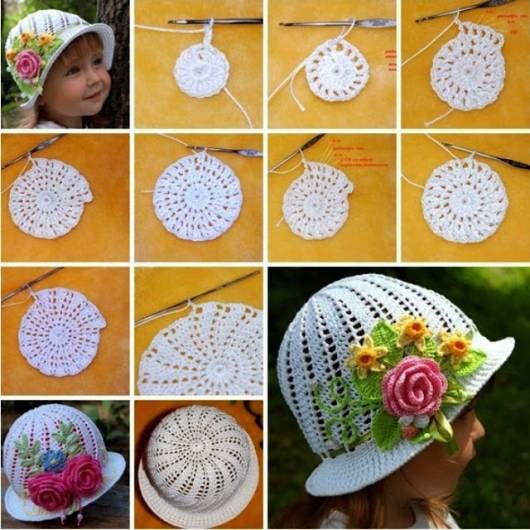
From: asreceitasdecroche2.blogspot.com
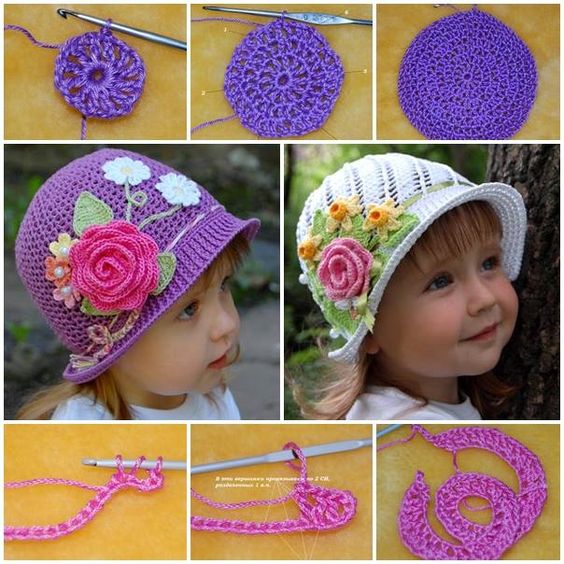
From: Pinterest
From Pinterest
Creative Ideas for Personalization
- Color changes: Use multiple colors to create stripes or color blocks on the hat.
- Embellishments: Sew small crocheted flowers or appliqués onto the brim for a playful, girly look.
- Custom sizing: Adjust the number of rounds in the crown and body to fit different head sizes.
Crocheting a pretty Panama hat for girls is a fun and creative way to make a personalized accessory that’s both stylish and functional. With the right materials and a little patience, you’ll create a charming hat that any girl will love to wear, whether it's for a sunny day out or a cute summer look.
Get your yarn, crochet hook, and imagination ready to bring this adorable project to life!
CHECK MORE CROCHET PATTERNS