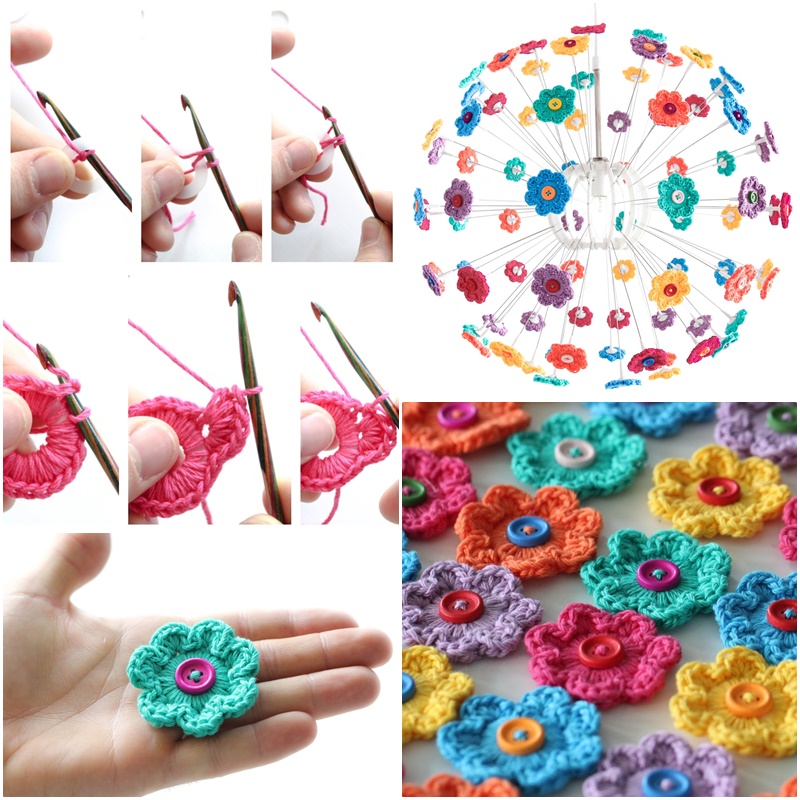
How To Crochet Mini Hoop Flowers: A Charming DIY Project

If you're looking for a delightful crochet project that’s small, quick, and absolutely charming, mini hoop flowers are a perfect choice.
These miniature crochet flowers, set inside tiny hoops, make adorable decorations for your home, thoughtful gifts, or stylish accessories like keychains and brooches.
Their compact size allows you to use up leftover yarn and explore different color combinations without committing to a long project.
How To Crochet Mini Hoop Flowers
This is a very creative idea. It clearly demonstrates a delicate artwork can be made from normal materials with some imagination.
These crochet flowers are so beautiful, and it is easy to learn even for beginners of crocheting.You can make some to decor your home, or for kid’s headband, or bed cover etc.
In this guide, we’ll show you how to crochet mini hoop flowers, provide creative ideas for displaying them, and offer tips for customization. Let’s dive into this fun, fast-paced project and bring some handmade floral beauty into your life!
Crochet Mini Hoop Flowers
- Quick and Fun: Mini hoop flowers are a fast crochet project that you can finish in under an hour, perfect for when you want a creative break.
- Versatile Decor: These little flowers can be used as wall art, ornaments, or even fashion accessories.
- Great for Gifting: Handmade mini hoop flowers make lovely gifts, especially when personalized with colors and designs that suit the recipient.
- Beginner-Friendly: The simple pattern and small size make this project ideal for beginners or for seasoned crocheters looking for something fun and relaxing.
Mini Crochet Flower

This five petal mini flower measures approximately 2-1/2 inches.

Before you begin crocheting your mini hoop flowers, make sure you have the following materials:
- Yarn: Choose lightweight yarn like cotton or acrylic in several colors—one for the flower, one for the leaves, and another for the background.
- Crochet Hook: A small hook, between 2.5mm and 3.5mm, works best for creating small, delicate stitches.
- Mini Embroidery Hoop: Select a mini hoop (about 2 to 4 inches in diameter) to frame your crochet flower.
- Yarn Needle: For weaving in ends and attaching pieces.
- Scissors: To trim any excess yarn after finishing.
- Glue (optional): To secure the crochet piece inside the hoop, though sewing it in place also works well.
How to Crochet Mini Hoop Flowers
1. Start with the Flower Center
- Magic Ring: Begin by making a magic ring with the color you’ve chosen for the center of your flower. This will help create a tight, defined center.
- Single Crochet Stitches: Crochet 6 single crochets (SC) into the magic ring and pull tight to close. Slip stitch into the first SC to finish the round.
"A magic ring creates a clean, tight center for your flower, giving it a polished and professional look."
2. Crochet the Flower Petals
- Chain for the Petals: To create the petals, chain 3 and work 2 double crochets (DC) into the same stitch as the chain.
- Complete the Petal: Chain 3 again and slip stitch into the next stitch. This completes your first petal.
- Repeat for Remaining Petals: Continue this pattern around, working chain 3, 2 DC, chain 3, and slip stitch into the next stitch until you have completed 6 petals.
- Fasten Off: Once all petals are done, fasten off and weave in the ends.
"Crocheting evenly spaced petals creates a symmetrical, full flower that fits beautifully into a mini hoop."
3. Add Leaves (Optional)
- Attach Green Yarn: Join green yarn to the back of your flower where the petals meet the center.
- Chain for Leaves: Chain 6 to create a leaf, then slip stitch into the next space between petals.
- Repeat for a Second Leaf: Chain another 6 for a second leaf and slip stitch into the next space. You can add as many leaves as you like, but 1 or 2 small leaves usually fit well in a mini hoop.
- Fasten Off: Once the leaves are complete, fasten off and weave in the ends.
"Adding small leaves gives your crochet flower a more realistic and balanced appearance, enhancing its overall charm."
4. Prepare the Background
- Create a Circular Background: Using a contrasting yarn color, create a simple circular background by crocheting a flat circle. Start with a magic ring and crochet 6 SC into it. Continue increasing the stitch count in each round (e.g., 2 SC in each stitch) until the circle fits snugly inside your mini embroidery hoop.
- Fasten Off: Once the circle is the right size, fasten off and weave in the ends.
"The background provides a nice contrast to the flower, making it stand out in the mini hoop."
5. Assemble the Mini Hoop Flower
- Insert the Crochet Piece into the Hoop: Place your circular background with the attached flower inside the mini hoop, adjusting it until it sits nicely in the center.
- Secure the Piece: Tighten the hoop to secure the crochet piece. You can also use glue around the edges for extra security, though this step is optional.
- Trim Excess Yarn: If needed, trim any excess yarn from the back of the hoop.
CHECK MORE CROCHET PATTERNS