How to crochet pine tree
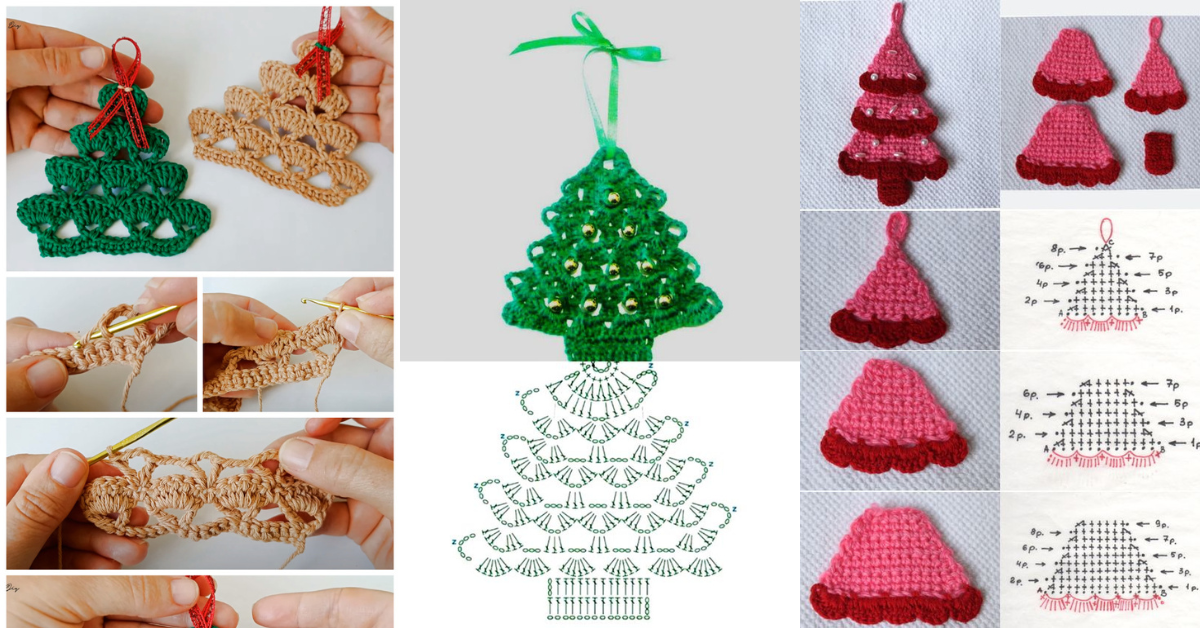
The pine tree is one of the main symbols of Christmas. There are many styles and items that you can use in your Christmas decor, but the Christmas tree cannot be missing.
To add color and style to your Christmas, today we show you how to crochet Christmas trees.
Your Christmas trees can be made using different styles. Check here for a video tutorial and some ideas to use as inspiration.
See too: Wonderful Christmas ornaments made with string
How to crochet pine tree

Crochet pine tree ideas
Crochet Pine Tree Ideas for Holiday Decor
1. Mini Crochet Pine Trees for Table Decor
Mini crochet pine trees make lovely table decorations, centerpieces, or gift toppers.
How to Create a Mini Crochet Pine Tree
- Start with the Base: Chain a small ring or use a magic ring to begin the base.
- Increase Rows: Work in the round, gradually increasing stitches to form a cone shape.
- Decrease for Tapering: Once the tree reaches the desired width, start decreasing stitches to taper it up to a point.
- Add the Trunk: Use brown yarn to add a few rows at the bottom for the tree’s trunk.
Decorating Tip: Use tiny beads as ornaments or crochet a small star to place at the top of each mini pine tree.
2. Crochet Pine Tree Garland
Create a whimsical garland by stringing together small crochet pine trees. This is a festive option for mantels, doorways, or even as a unique Christmas tree garland.
Steps for a Crochet Pine Tree Garland
- Make Multiple Trees: Crochet several small pine trees using the mini tree method above.
- Attach to Ribbon: Sew or hot glue each pine tree onto a ribbon or chain for hanging.
- Add Accents: Interweave beads or small bells between each tree for added sparkle.
Styling Tip: Alternate pine trees with crochet snowflakes or small stars for a more dynamic look.
3. 3D Amigurumi Pine Tree
For a more lifelike look, try creating a 3D crochet pine tree with branch-like textures. These make great statement pieces on shelves or tabletops.
Steps for a 3D Amigurumi Pine Tree
- Create the Cone Shape: Start from the base and work in the round to form a cone.
- Add Branches Using Bobble Stitch: Use the bobble stitch to create “branches” along the cone, adding texture.
- Stuff with Fiberfill: Fill with polyester stuffing to give it shape.
- Add Trunk and Base: Crochet a small base in brown and attach it at the bottom.
For a snowy look, use a white yarn to crochet tiny “snowflakes” on the branches.
4. Layered Crochet Pine Trees
Layered crochet pine trees are designed with multiple tiers to resemble pine branches. These can be made in various sizes and look beautiful as standalone pieces or grouped together.
How to Make Layered Crochet Pine Trees
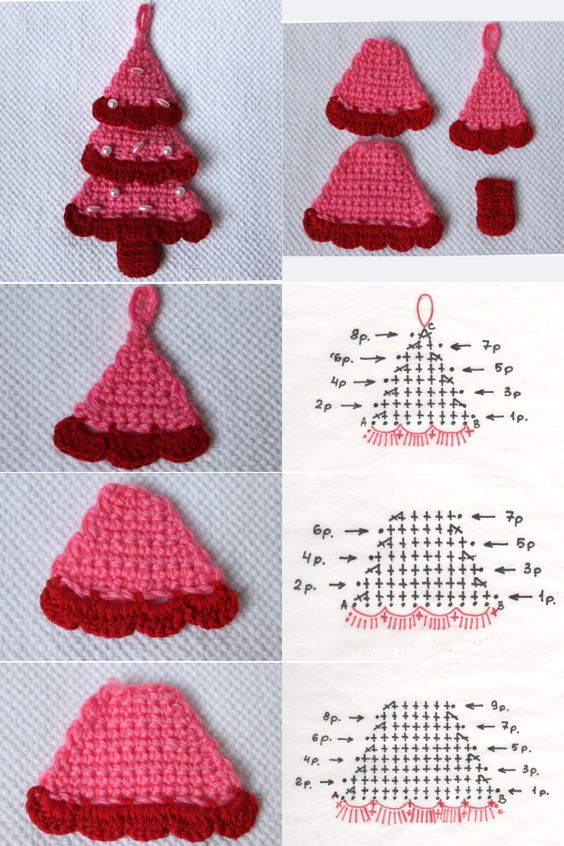
- Create Multiple Triangle Layers: Crochet triangles or half-circle layers in various sizes.
- Stack and Attach: Stack the layers from largest to smallest, sewing each layer slightly off-center to mimic branches.
- Trunk and Stand: Add a trunk and base for stability, using either crochet or a small wooden dowel for a rustic touch.
Alternate light and dark green yarns for each layer to give a realistic, shadowed effect.
5. Crochet Pine Tree Ornaments
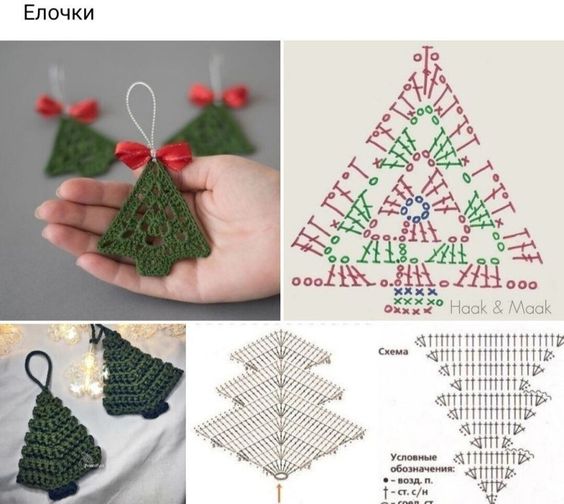
For Christmas tree decor, crochet small pine tree ornaments in various styles, like amigurumi, flat, or 3D.
How to Make Crochet Pine Tree Ornaments
- Choose Your Style: Decide if you want flat, round, or amigurumi-style trees.
- Add Embellishments: Sew on tiny beads, miniature bells, or use metallic thread to add sparkle.
- Attach a Loop: Add a yarn loop or metal hook for hanging.
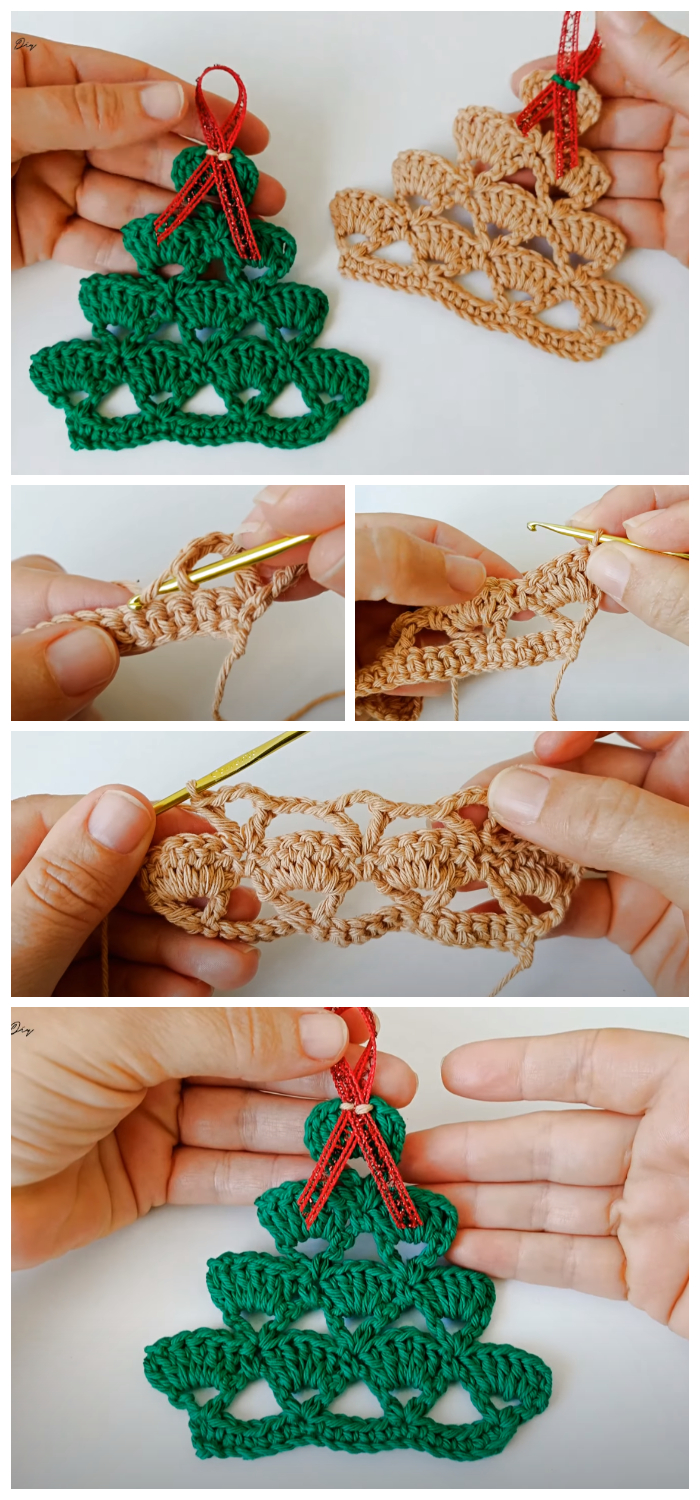
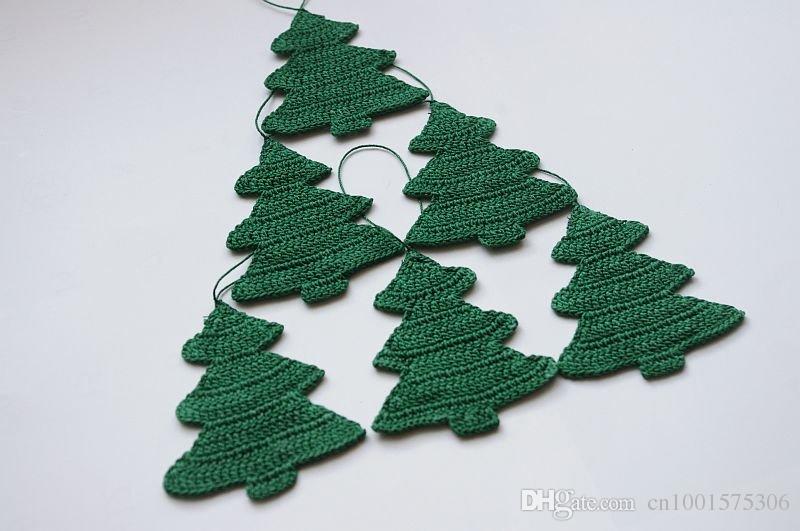
Via: pt.dhgate.com
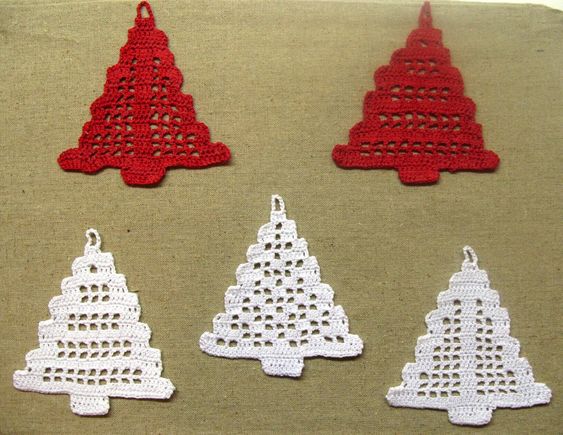
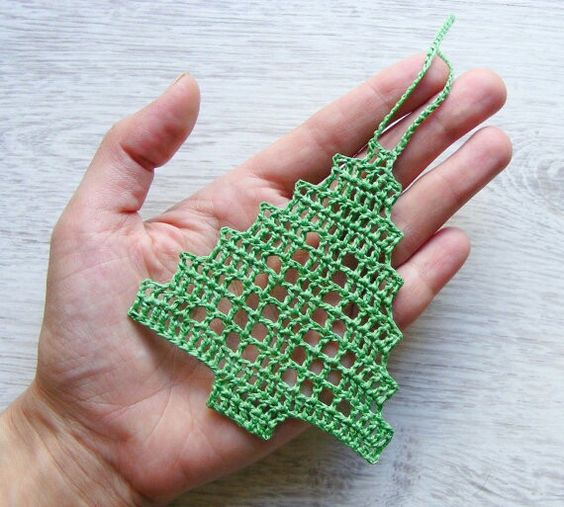
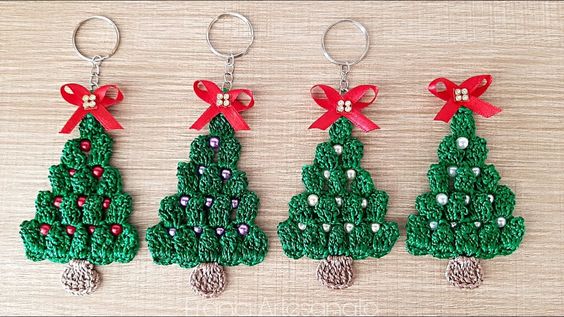
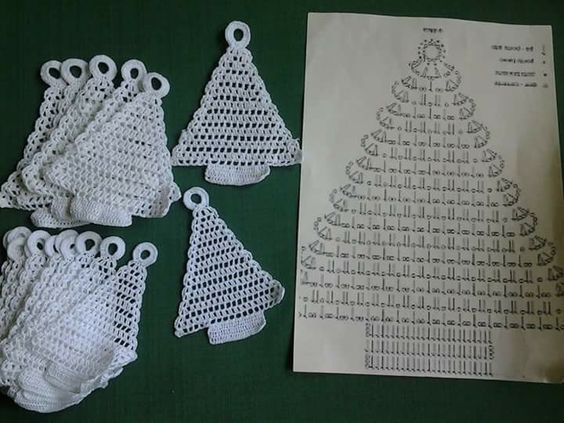
Via Pinterest
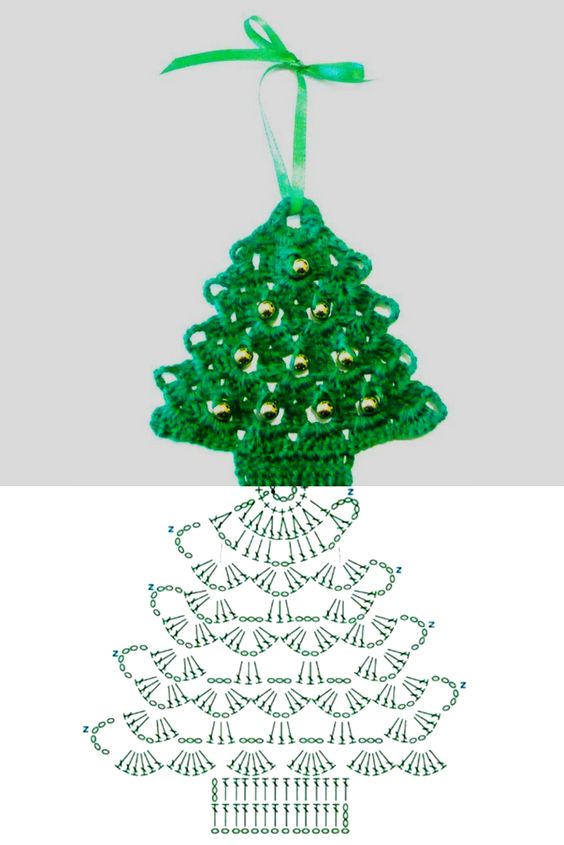
Via: Terra Hobby
Via: tecendoartesesonhos.blogspot.com
CHECK MORE CROCHET PATTERNS