How to make a yarn bird to use in your home decor
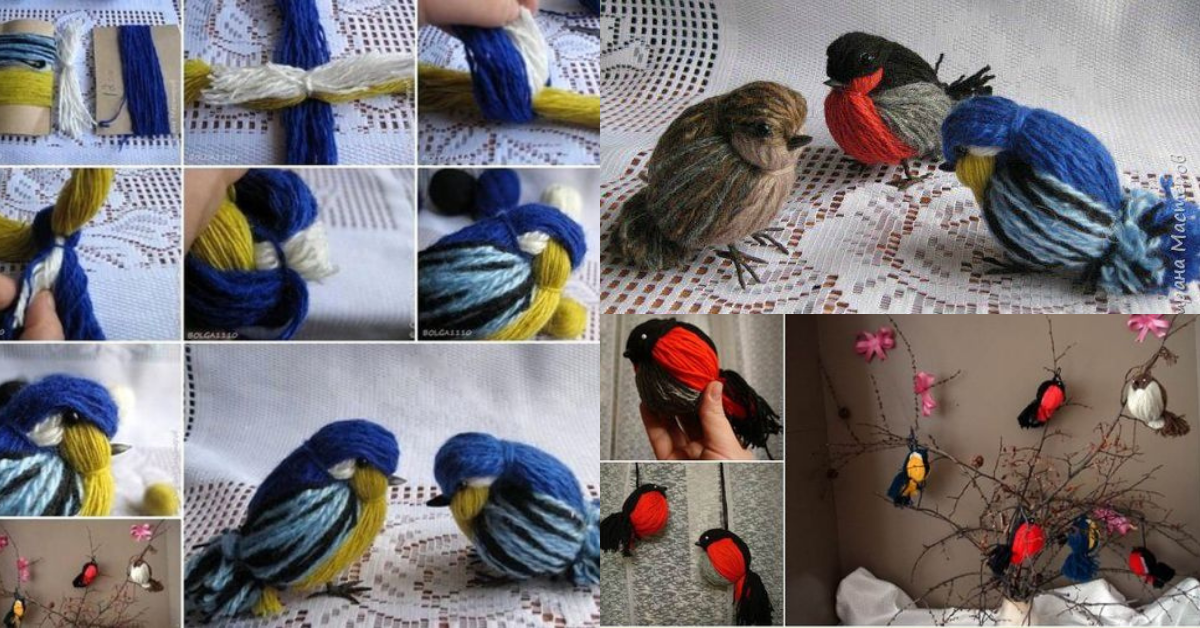
For those who like crafts and crochet, today we bring you a beautiful idea that you can use to reuse yarn scraps. They are beautiful birds that you can use in decoration.
Birds made from yarn can be made in many ways. Depending on the type of yarn you use and the colors you choose, you will create different birds.
Check out the step-by-step video here and some ideas to use as inspiration.
Also check: Reversible octopus crochet – Tutorial and ideas
Table
How to make a yarn bird

Yarn bird Ideas
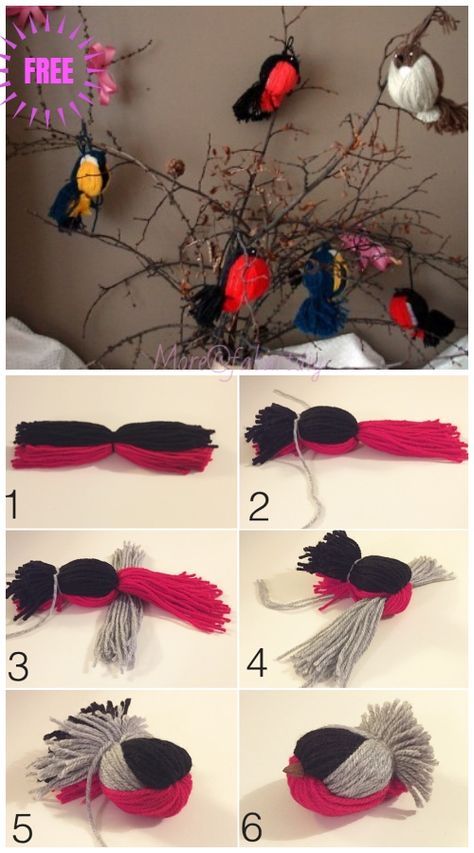
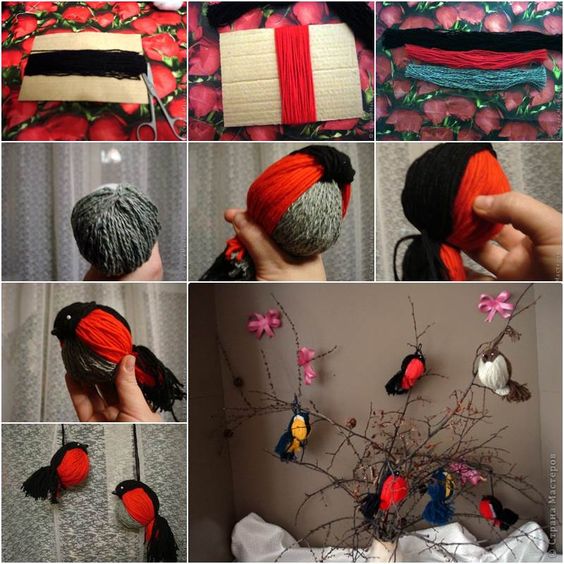
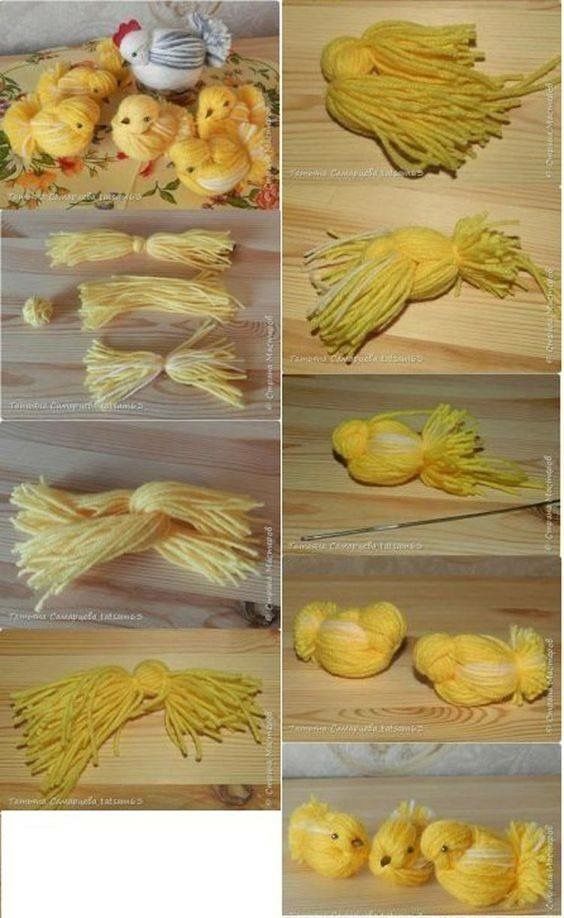
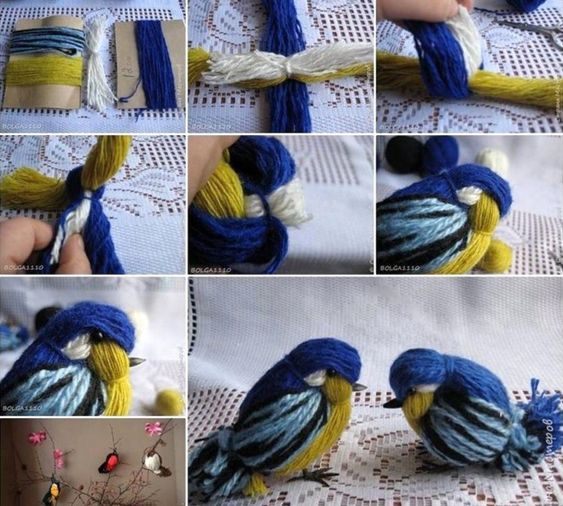
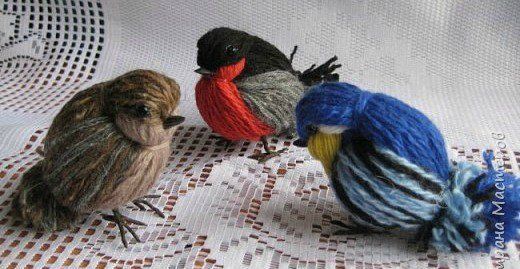
Materials Needed:
- Yarn in 2–3 colors (e.g., one for the bird’s body, one for the wings, and one for the beak).
- Scissors
- Cardboard or small object for winding yarn (optional, but helpful for even lengths)
- Cotton ball or small piece of felt (for stuffing)
- Glue (optional for securing parts)
- Small beads or black yarn (for eyes)
Step 1: Choose Your Yarn Colors and Cut the Yarn
To start, pick out the colors for each part of your bird:
- Body Yarn: Cut several pieces of yarn in the color you want for the bird’s body. For a small bird, pieces should be about 10–12 cm (4–5 inches) long.
- Wing Yarn: Cut a slightly smaller number of pieces in the second color for the bird's wings.
- Beak and Tail (optional): You can use a third color for the beak and tail if you’d like.
Step 2: Create the Bird’s Body
- Layer the Body Yarn: Take your body yarn pieces and lay them out neatly in a straight line, with each strand aligned.
- Add Stuffing: Place a small cotton ball or felt in the center of the body yarn. This adds a bit of bulk to the bird’s body.
- Fold and Tie: Fold the yarn over the stuffing and tie it tightly around the middle with another piece of yarn to secure the stuffing in place. The yarn should now resemble a fluffy bundle
Step 3: Form the Wings
- Layer the Wing Yarn: Take the yarn pieces for the wings and align them in a neat bundle, similar to the body.
- Attach the Wings: Place this bundle on top of the body yarn, near where you tied it around the stuffing. Wrap a piece of yarn tightly around both the wing and body yarn to attach them securely.
Step 4: Shape the Head and Beak
- Form the Head: Take a small amount of yarn from the body and pull it up to form a head shape. Wrap a separate piece of yarn around the neck area, just below the head, to secure it.
- Add the Beak: To make a beak, take a few short pieces of yarn in a different color (like orange or yellow). Fold them in half and tuck them into the head area. Use glue or another tie of yarn to secure them in place.
Step 5: Create the Tail
- Shape the Tail: The tail can be made by leaving some of the body yarn longer at the back end. Trim these pieces to your desired tail length and angle.
- Secure the Tail: Wrap a small piece of yarn around the base of the tail to keep the yarn strands aligned.
Step 6: Add the Eyes
- Eye Options: You can glue small beads on either side of the head for eyes, or use a small dot of black yarn if beads are unavailable.
- Alternative: Small embroidery stitches also work if you’re comfortable with needlework.
Step 7: Finishing Touches
- Fluff and Trim: Adjust the yarn and trim any uneven ends around the bird's body, wings, or tail.
- Shape the Bird: Gently pull and shape the yarn as needed to give the bird a rounded look. You can also glue down any loose yarn strands if you want a firmer shape.
CHECK MORE CROCHET PATTERNS